Building Multi-Tenant Dashboards
We have two fundamental design patterns when building a Dashboard:
- Single Source of Truth: All users of your Dashboard will see the same data. This is useful for industrial IoT or Home Automation applications.
- Multi Tenancy: Data shown in a particular widget is unique to a given client/session/user. This represents a more traditional web application, where each user has their own session and associated data.
By default, any data passed to a Dashboard node is broadcast to all connected clients, and therefore visible to all users ("Single Source of Truth"). In Industrial IoT type use-cases, this is very useful where you may have a chart showing data about a given piece of equipment.
In other cases though, you may wish to send data to just a single client/user, this is where multi-tenancy comes in, and allows you to define constraints on which clients receive particular data.
You can read more about the design patterns here.
Understanding Client Data
With "Include Client Data" enabled, every msg a node emits will have a _client object appended to it. This object will detail any available information about the client/user interacting with a given Dashboard.
Core Client Data
Out of the box, Dashboard will append two piece of information to the _client object:
socketId: The unique ID of the socket connection that the client is using to interact with the Dashboard.socketIp: The IP address of the client interacting with the Dashboard.
Authentication Providers
Plugins, such as the FlowFuse User Addon, are available to append additional information to the _client object.
These Authentication plugins can be installed via the Node-RED Palette Manager, and often require Node-RED to be setup with a given Authentication provider, separately from Dashboard.
The plugins will append additional information to the _client object, such as the user object, which details the user's name, email address, and any other information that the Authentication provider has available.
FlowFuse User Addon
The FlowFuse User Plugin, has a requirement for Node-RED to be running on FlowFuse with the FlowFuse User Authentication option enabled.
FlowFuse automatically handles all of the authentication provider setup, and so there is no need for you to configure this yourself.
Cloudflare Access

The Cloudflare Access Plugin requires Node-RED to be setup with Cloudflare Access, with a Cloudflare tunnel configured for your node-RED instance, and the relevant access policy setup.
Authelia Auth

The Authelia Auth Plugin plugin adds user data if your Node-RED instance is secured with the open-source authentication server, Authelia.
Authentik Auth
This Authentik Plugin plugin adds user data if your Node-RED instance is secured with the open-source authentication server, Authentik.
This plugin assumes that you have a running Authentik instance and that you have configured it to use a forward auth Proxy Provider as an authentication provider for Node-RED.
The proxy provider will set the appropriate headers necessary for FlowFuse Dashboard to receive the user info from Authentik.
Configuring Client Data
In the Dashboard sidebar within the Node-RED Editor, you will find the "Client Data" tab:
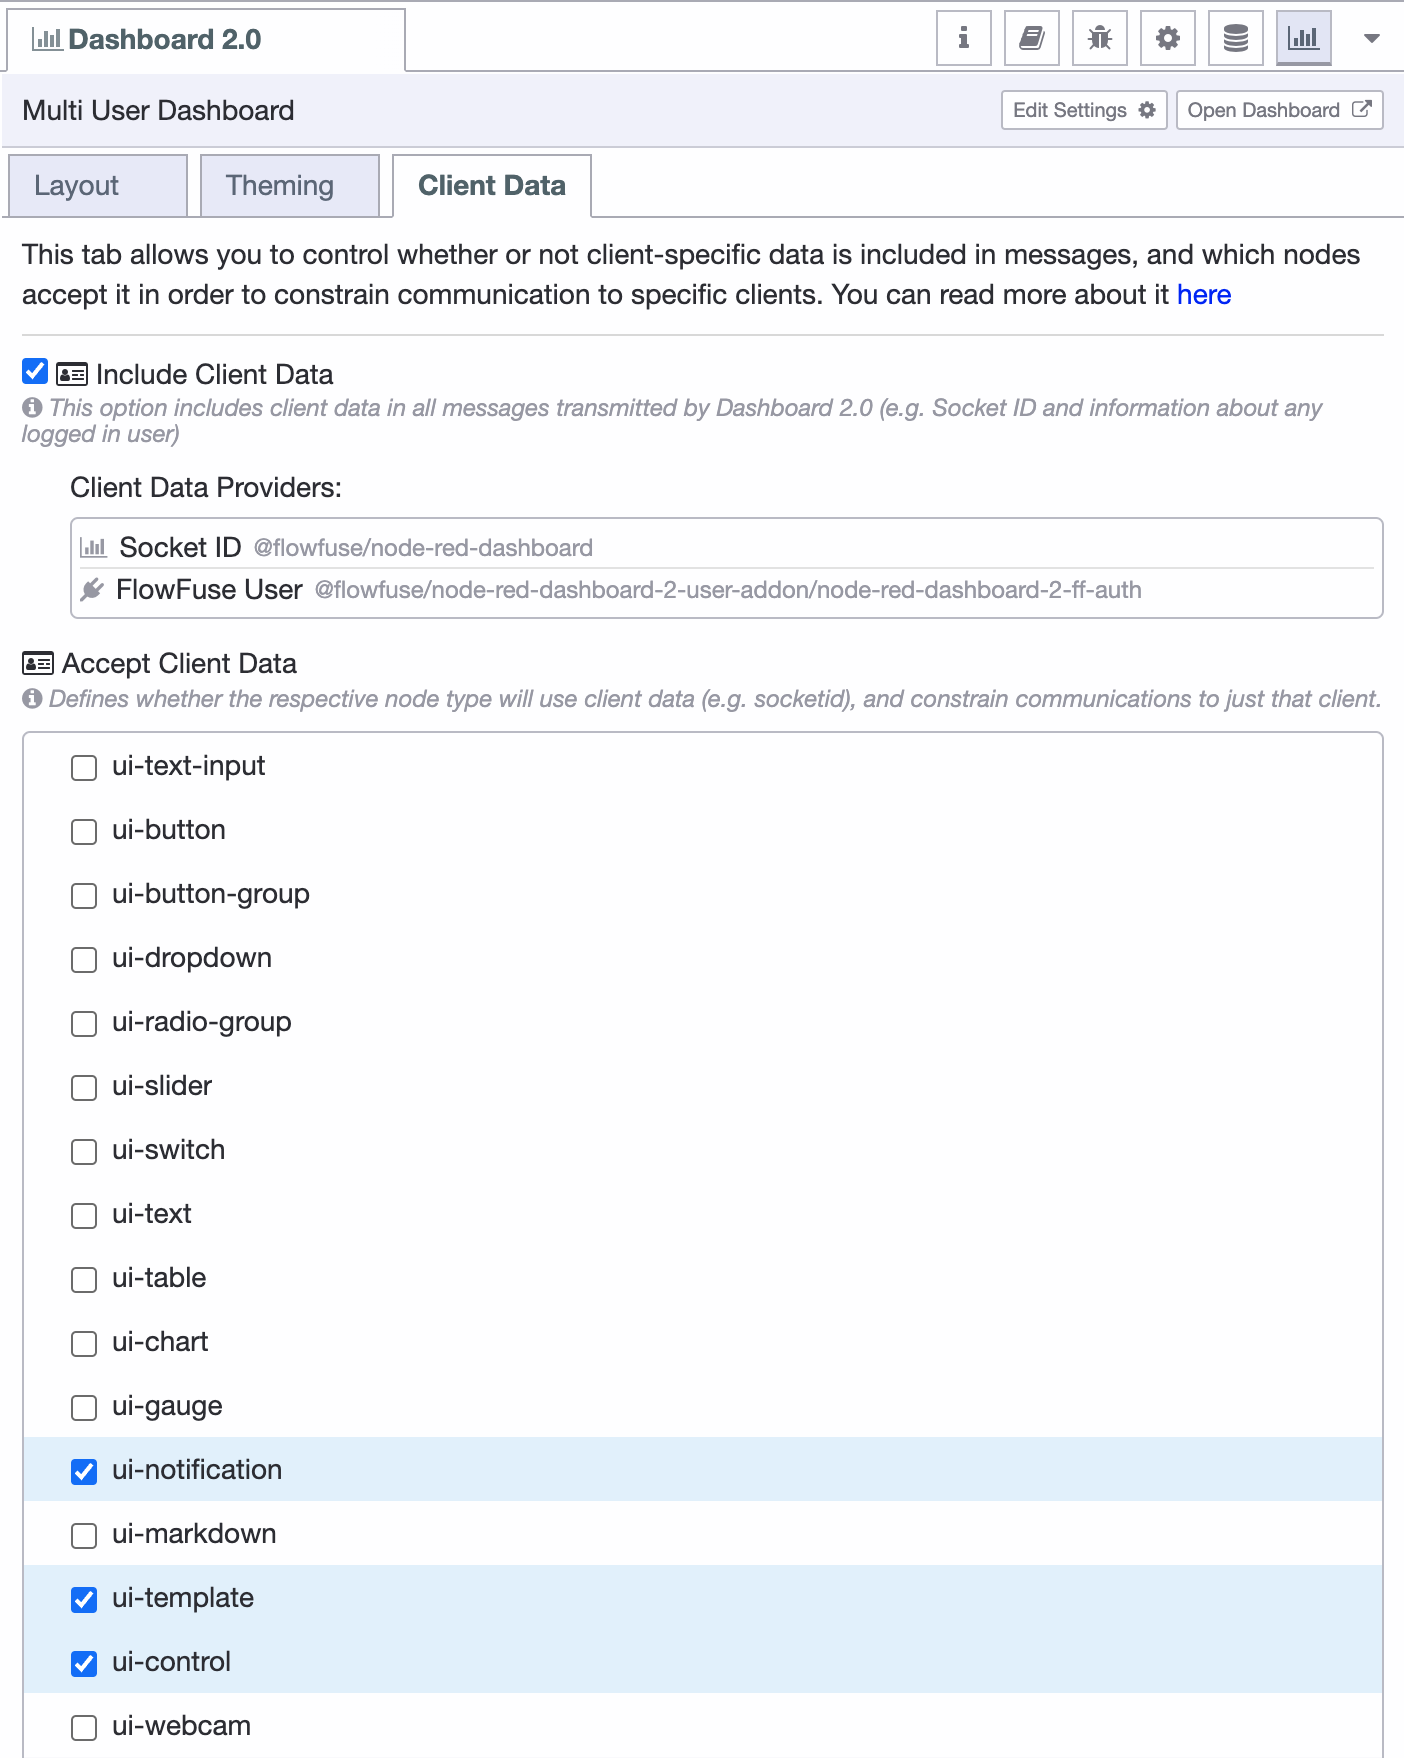 Screenshot of an example "Client Data" tab
Client data defines information on the user/client interacting with the Dashboard. This data can be appended to every msg a node emits, underneath the msg._client object.
When "Include Client Data" is enabled, every msg._client will detail the socketId and socketIp of any connected users.
Examples
Storing User Data
By default, Dashboard will store the latest messages received against a given node in its own context stores. However, for nodes that are setup to "Accept Client Data", this is not he case, as it's very memory inefficient for us to automatically store data for every message, for every user against every widget.
Instead, the recommended pattern is to use the "change" node, and the built-in global and flow context stores of Node-RED. We can make use of the [] annotation available in the "change" node, to store an object of the latest submitted form for a given user (making the most of the FlowFuse User Addon to get msg._client.user.username):
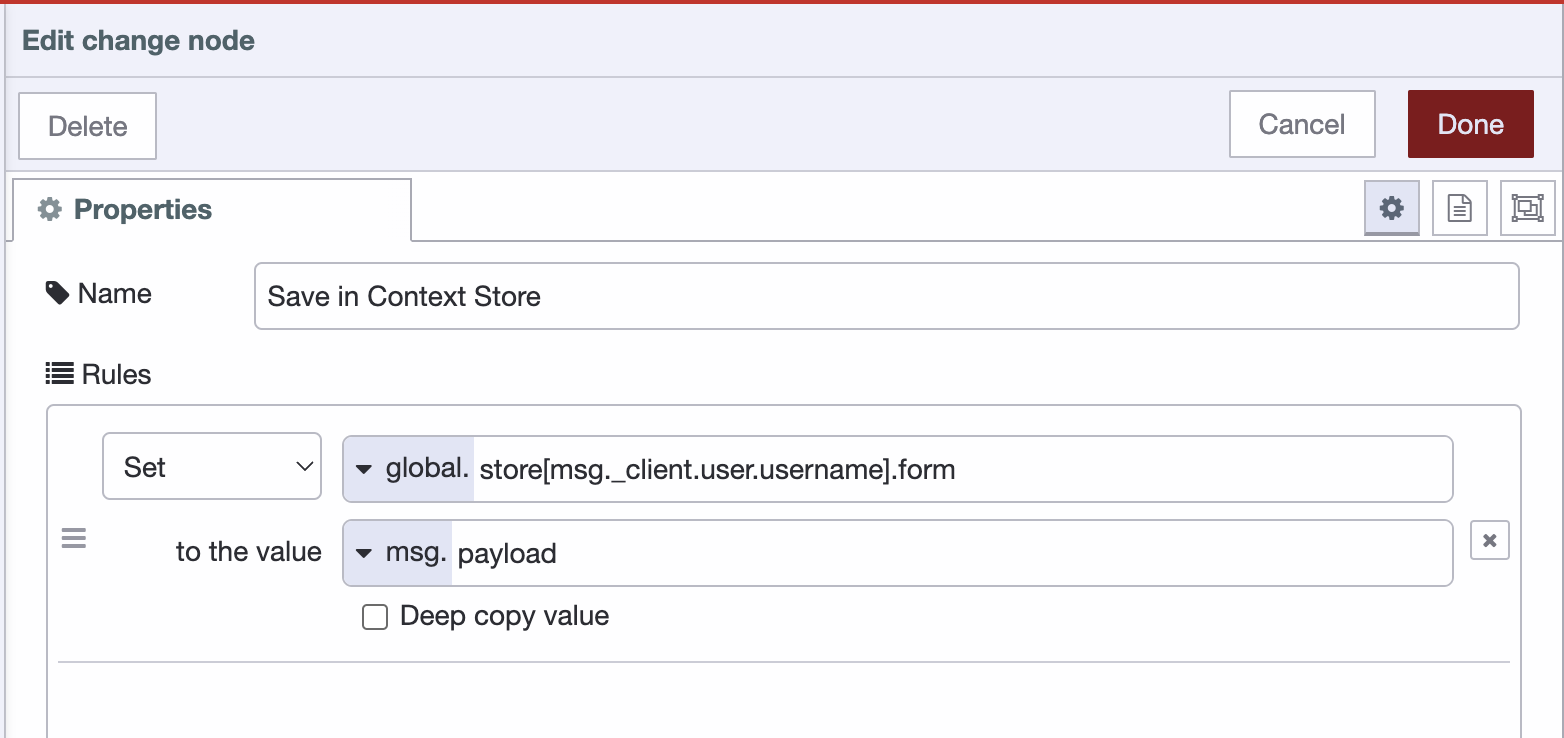 Screenshot showing the configuration of the "change" node to map dat against a specific user
In a full flow, we'd be able to then do the following:
Let's take a look at the steps involved here:
- When a user loads the page,
ui-eventtriggers a$pageviewevent, containing the details of the user viewing the page. - We check our
globalcontext store to see if we have any data stored against the user's username. - If we do, we set
msg.payloadto the contents of the store, otherwise, branch to a "debug" node. - Send the
msg.payloadto the form to populate it with the stored values. - On submit of the form, save the contents of the form to the
globalcontext store, using the user's username as the key.
Comparing different communication options
Here we demonstrate three different clients opening the same Dashboard.
The Dashboard consists of three sliders and a chart, and is running on FlowFuse, with the "FlowFuse User Addon" plugin enabled.
Two of the clients are logged in as the same user, and the third, "Another User".
We can see how it's possible to control the interaction of a widget, and how the data emitted from that widget is shared to other components and clients.
"Send to All Users" slider pass through a change node which removes the
_clientobject from the message, meaning that the data is sent to all clients, as no constraints are defined."Send to Same User" slider passes through a change node, and has the
socketIdfield removed frommsg._client, leaving just theuserobject. This means the data is sent to any connected clients where the same authenticated user is found."Single Client" slider just passes its default output to the "Chart" node, including the full
msg._clientobject. This means that the data is only sent to the client (socketId) & user (user) that interacted with the slider.
Below you will find the flow that runs the above example:
